When it comes to keeping our closets organized, one of the most overlooked yet essential items is the humble shoe rack. A well-designed shoe rack can not only help to keep our shoes tidy and easily accessible but also add a touch of style to our closets. In this article, we will explore the world of DIY shoe racks, providing you with the inspiration and guidance you need to create your own unique and functional shoe storage solution.
Why Choose a DIY Shoe Rack?

There are many reasons why you might choose to build your own shoe rack rather than purchasing one from a store. For one, DIY projects allow you to tailor your shoe rack to your specific needs and preferences. Whether you have a large collection of shoes or a small, eclectic assortment, a DIY shoe rack can be designed to accommodate your unique requirements. Additionally, building your own shoe rack can be a fun and rewarding project, allowing you to express your creativity and add a personal touch to your closet.
Key Points
- DIY shoe racks offer customizable storage solutions for your shoes
- Building your own shoe rack can be a fun and rewarding DIY project
- DIY shoe racks can be designed to fit any budget or style
- With a DIY shoe rack, you can add a personal touch to your closet
- DIY shoe racks can help to keep your shoes organized and easily accessible
Materials and Tools Needed
Before you begin building your DIY shoe rack, you will need to gather the necessary materials and tools. The specific materials you will need will depend on the design and size of your shoe rack, but some common materials used for DIY shoe racks include wood, metal, and plastic. You will also need a variety of tools, such as a saw, drill, and sandpaper, to help you cut, assemble, and finish your shoe rack.
| Material | Quantity |
|---|---|
| Wood (e.g. pine or cedar) | 2-4 boards, depending on size |
| Metal (e.g. aluminum or steel) | 1-2 frames, depending on design |
| Plastic | 1-2 bins or containers, depending on size |
| Screws | 10-20, depending on design |
| Nails | 10-20, depending on design |
| Glue | 1 bottle |
| Sandpaper | 1 sheet |
| Paint or stain (optional) | 1 can or bottle |

Designing Your DIY Shoe Rack

Once you have gathered your materials and tools, it’s time to start designing your DIY shoe rack. There are many different designs and styles to choose from, depending on your needs and preferences. Some popular designs for DIY shoe racks include wall-mounted racks, floor-standing racks, and hanging racks. You can also add features such as shelves, drawers, and cubbies to provide additional storage and organization.
Wall-Mounted Shoe Racks
Wall-mounted shoe racks are a great option for small closets or apartments, as they take up minimal floor space and can be easily installed on a wall. To build a wall-mounted shoe rack, you will need to attach a series of shelves or hooks to a wooden or metal frame, which can then be mounted to the wall using screws or nails.
Floor-Standing Shoe Racks
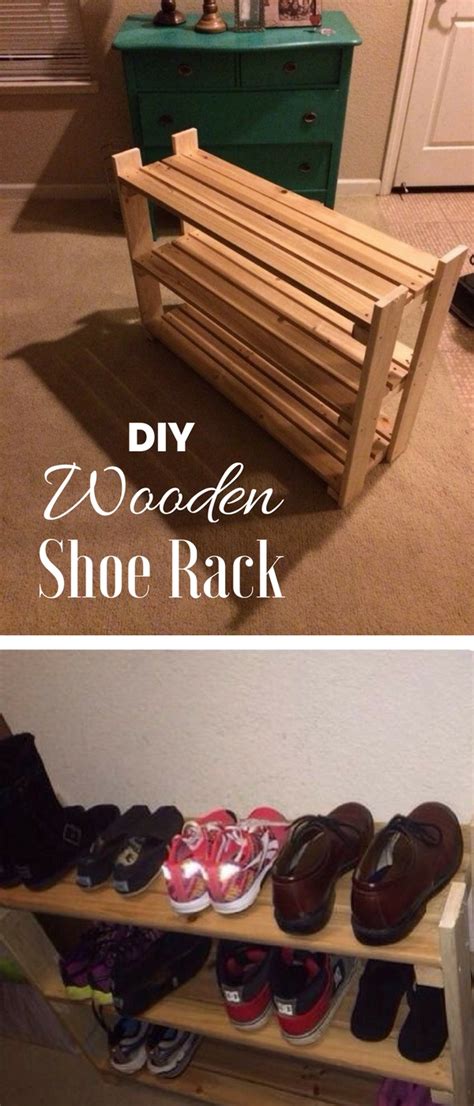
Floor-standing shoe racks are a great option for larger closets or entryways, as they can hold a large number of shoes and can be easily moved or rearranged as needed. To build a floor-standing shoe rack, you will need to assemble a frame using wood or metal, and then attach shelves or cubbies to the frame.
What is the best material to use for a DIY shoe rack?
+The best material to use for a DIY shoe rack depends on your needs and preferences. Wood is a popular choice because it is easy to work with and can be stained or painted to match your closet's decor. Metal is also a good option because it is durable and can be easily assembled and disassembled.
How do I assemble a DIY shoe rack?
+Assembling a DIY shoe rack will depend on the design and materials you are using. Generally, you will need to follow a series of steps, including cutting and assembling the frame, attaching shelves or cubbies, and finishing the rack with paint or stain.
How do I install a wall-mounted DIY shoe rack?
+Installing a wall-mounted DIY shoe rack will require you to attach the rack to the wall using screws or nails. Make sure to choose a sturdy wall anchor and follow the manufacturer's instructions for installation.
With these tips and ideas, you can create a beautiful and functional DIY shoe rack that meets your needs and adds a touch of style to your closet. Whether you choose a wall-mounted, floor-standing, or hanging design, a DIY shoe rack is a great way to keep your shoes organized and easily accessible. So why not get creative and start building your own DIY shoe rack today?